
I went to Paragon Tools in Wexford and got a couple of clock faces, they were about €12 or €13 euro each.
I started with the Zebra wood first and mounted it on my lathe as usual, i turned recess in the
blank to place my dovetail jaws into, i then remounted it and turned the front of the clock, i hollowed out the center enough so the clock would fit nice and snug, the clock inserts had these flaps on it which press outwards so when you put the clock in these flaps press outwards and hold it in place nicely.
 Once i had the front finished the way i liked it i rounded over the edge. at this stage i wasn't sure if i was going to be able to remount it like it was so i finished the front by sanding up through the grits from 150 grit to 800 grit and finishing by burnishing it with it's own shavings and used Chestnut's Wax to finish it.
 I mounted the piece in the opposite direction by using the recess i had turned for the clock to fit in as a place to expand the dovetail jaws in, i wasn't too worried about jaw marks in here as you wouldn't see here when the clock was in.
I turned the back of it and once again rounded over the edge to meet with the front round over to make a nice curve going around it. I finished this side in the same way as i finished the back.
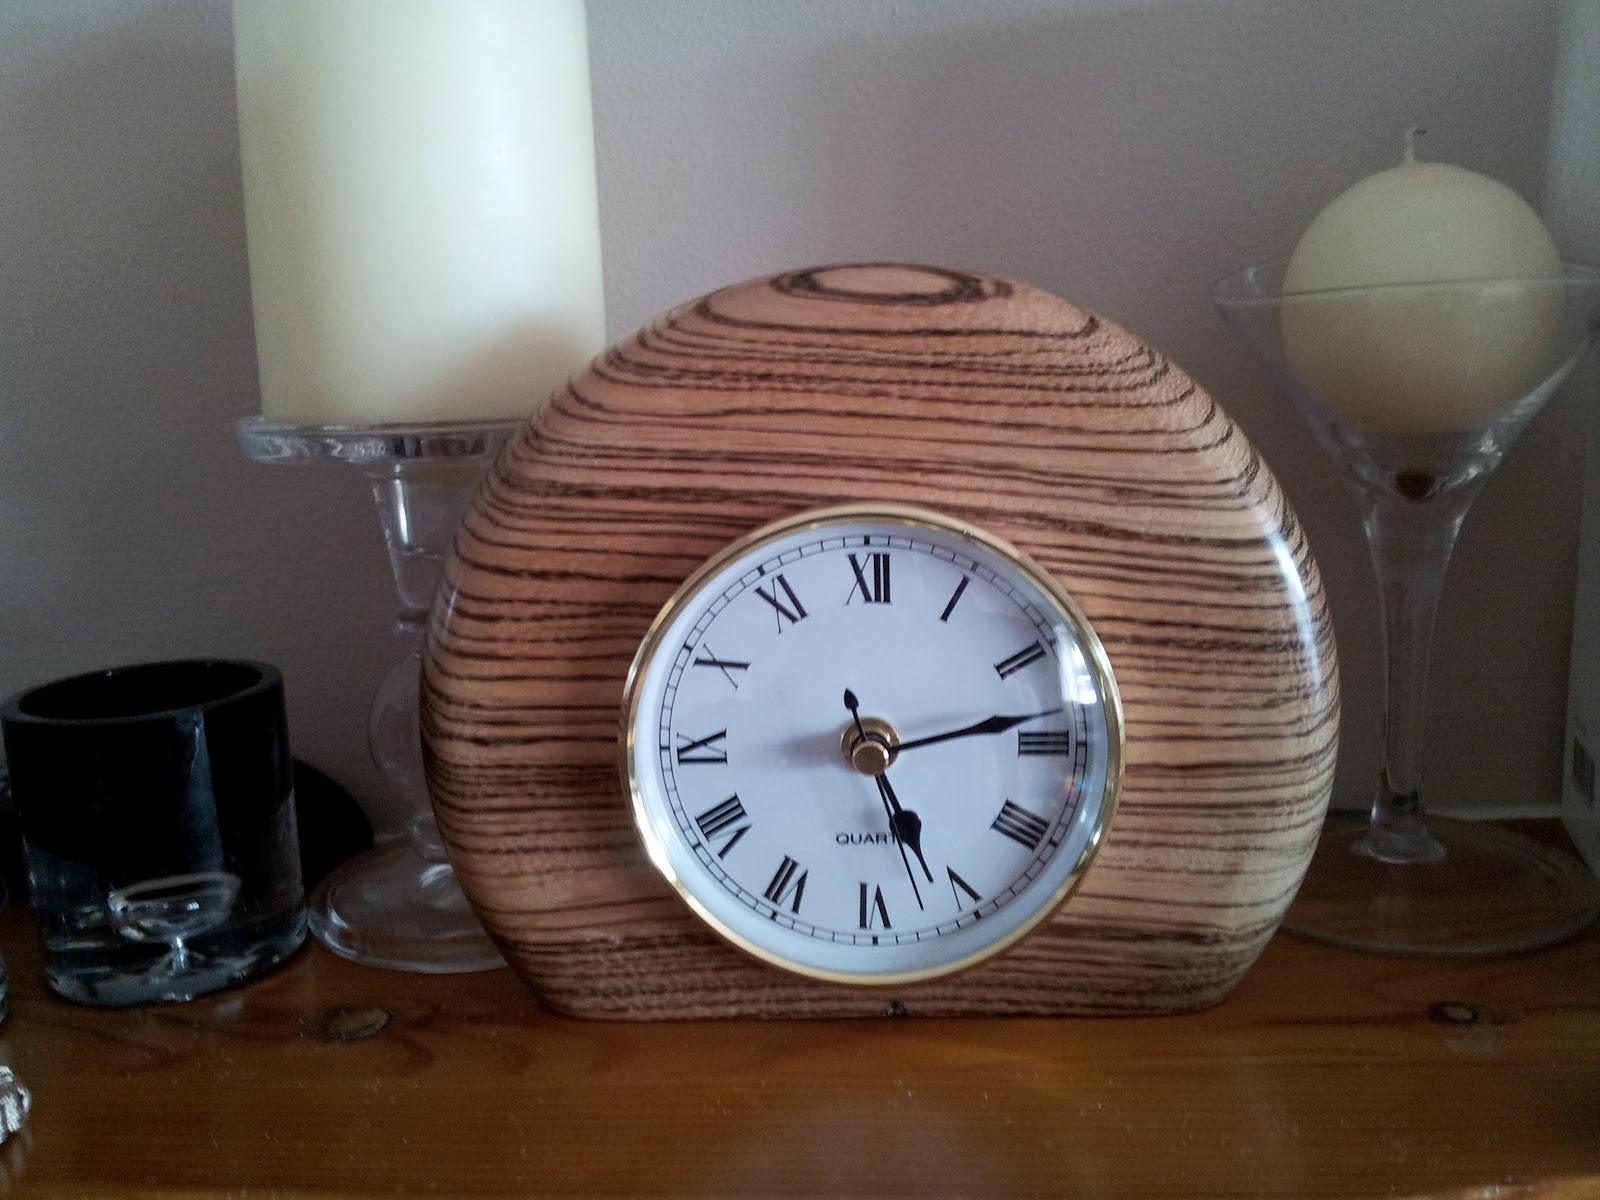 Now to give it an area to stand i brought it over to my cross cut miter saw and clamped it in place and cut at 90 degrees to the face, i lightly sanded this surface then but applied no finish, this would give it a bit of grip on whatever surface it was to go on, i toyed with the idea of felt or little rubber feet but liked how it looked flush with the surface it was on.
 For
the bubinga i done the same process but placed 3 rings around the face
using a parting tool. Also when i was cutting the base i angled it to 10
degrees, any more and it would fall backwards, it gives it a nice
angled look on a lower surface.
For
the bubinga i done the same process but placed 3 rings around the face
using a parting tool. Also when i was cutting the base i angled it to 10
degrees, any more and it would fall backwards, it gives it a nice
angled look on a lower surface.


No comments:
Post a Comment